As social distancing has become the new norm, use of video conferencing tools like Zoom, Houseparty and Google Hangouts have soared. Our family went from using these tools a few times a month for virtual meetings with people across the country (and world) to using them multiple times per day just to talk to people across town. That’s a LOT more screen time than I’ve ever wanted to have!
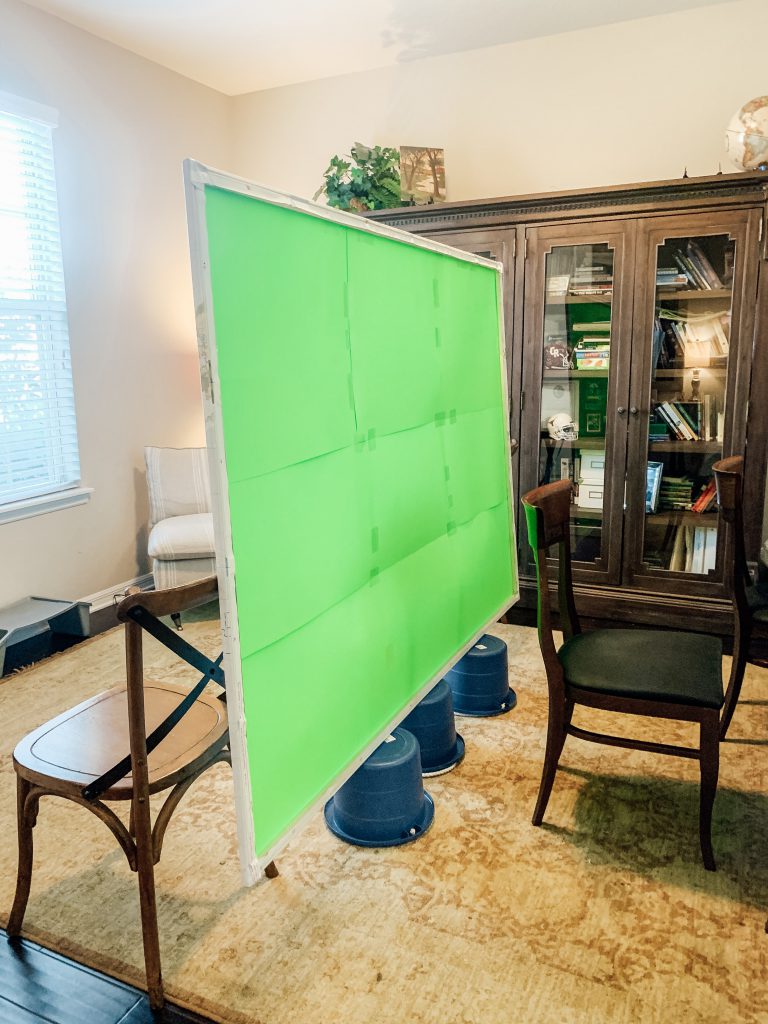
But with $7 worth of green poster board, these meetings have become way more interesting, not to mention letting people see only parts of the house I want them to see.
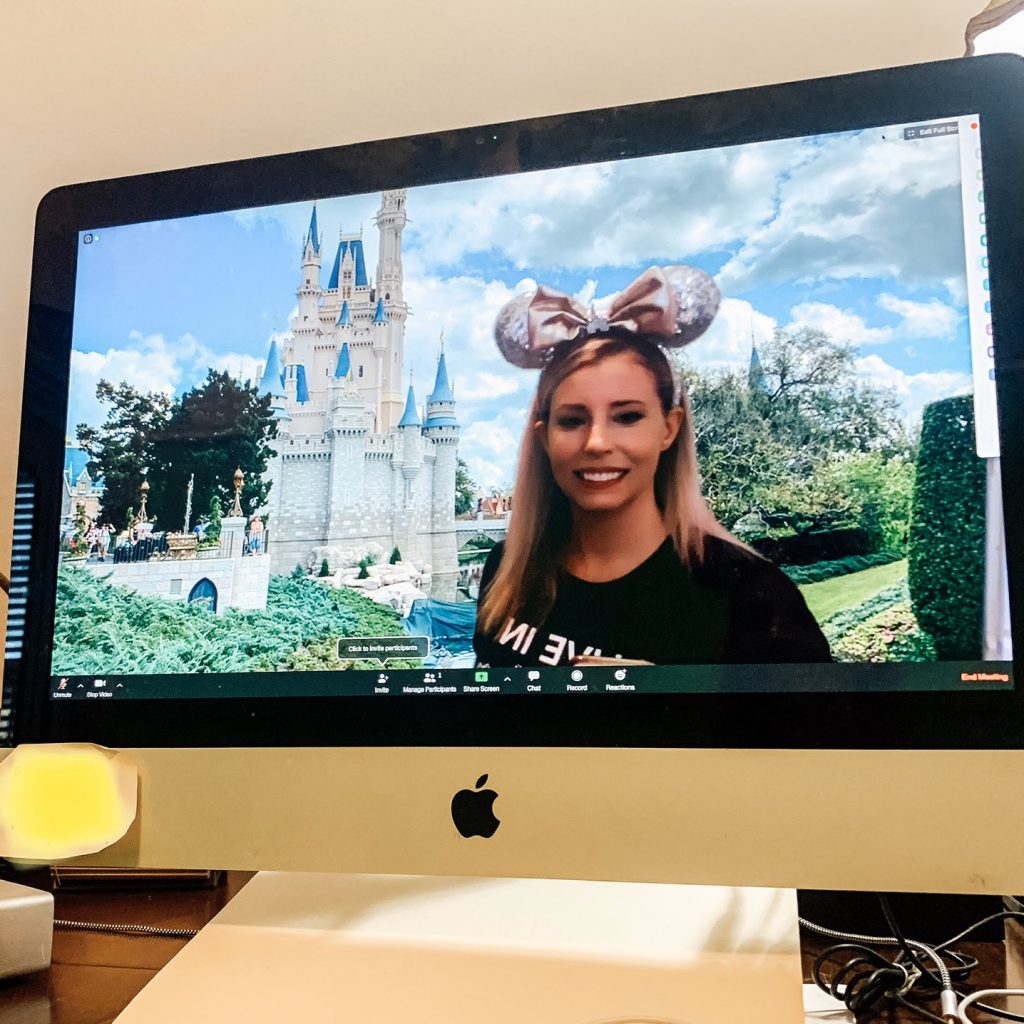
Some apps, like Zoom, allow users to place virtual backgrounds behind them. Depending on your computer, you may not even need an actual green screen behind you to make this Zoom feature work. But I’ve found that the computer-generated green screens are very fuzzy and kinda fade in and out. Projecting the image onto an actual green screen produces crisp outlines and a much more realistic look. So for us, it was totally worth making our own.
Before we start on the how, you might be wondering why poster board? Let me tell you…. Before using poster board, I tried making my DIY screen by using some green curtains and a set of green sheets I already had. The problem with both of those (besides not having a good place to suspend them) was that the green screen needs to be perfectly smooth. It also needs to be thick enough that light doesn’t penetrate it unevenly. Both my fabric green screens just did not lay straight enough for me to use. I would have needed a frame with clamps to really stretch the fabric tight. And both sets I used allowed too much light through the fabric for the virtual backgrounds to work effectively.
I could have bought a green screen kit with all of the accessories I needed to make it work but only the really expensive ones had good reviews, and they just looked like a pain to set up and take down. I mean….no wrinkles? I’m not going to iron 7 feet of fabric every time I have a Zoom meeting! The poster boards worked great because they are already so smooth and they are thick enough to provide a solid background for the virtual images. And the best part…at $.69 per poster board (at my Walmart), they are CHEAP!
So let’s get to it.
How to make an easy DIY green screen:
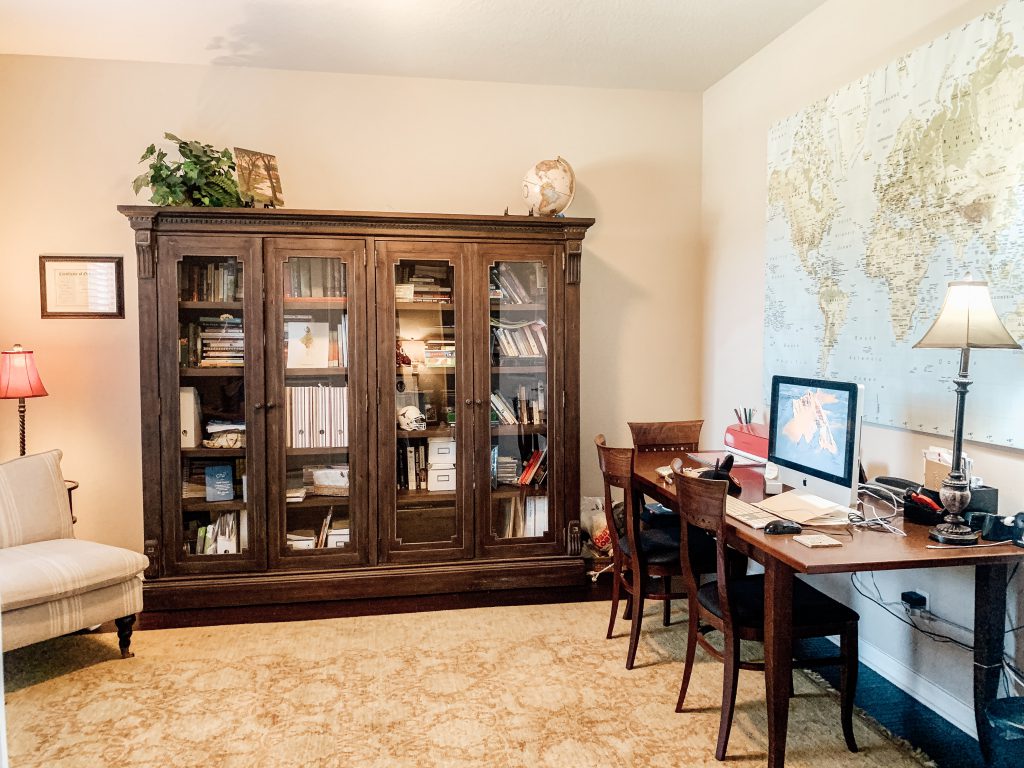
1. Find a large surface to cover with green poster boards. We used the back of a large map already hanging on our wall. Our map is 5’ by 7’ so it works great for two people side by side on calls. Other ideas would be to use an actual wall if you already have one a few feet behind your desk or to just tape the poster boards together over a frame of thin, lightweight wood. It doesn’t have to look pretty. The key is lightweight and portable!
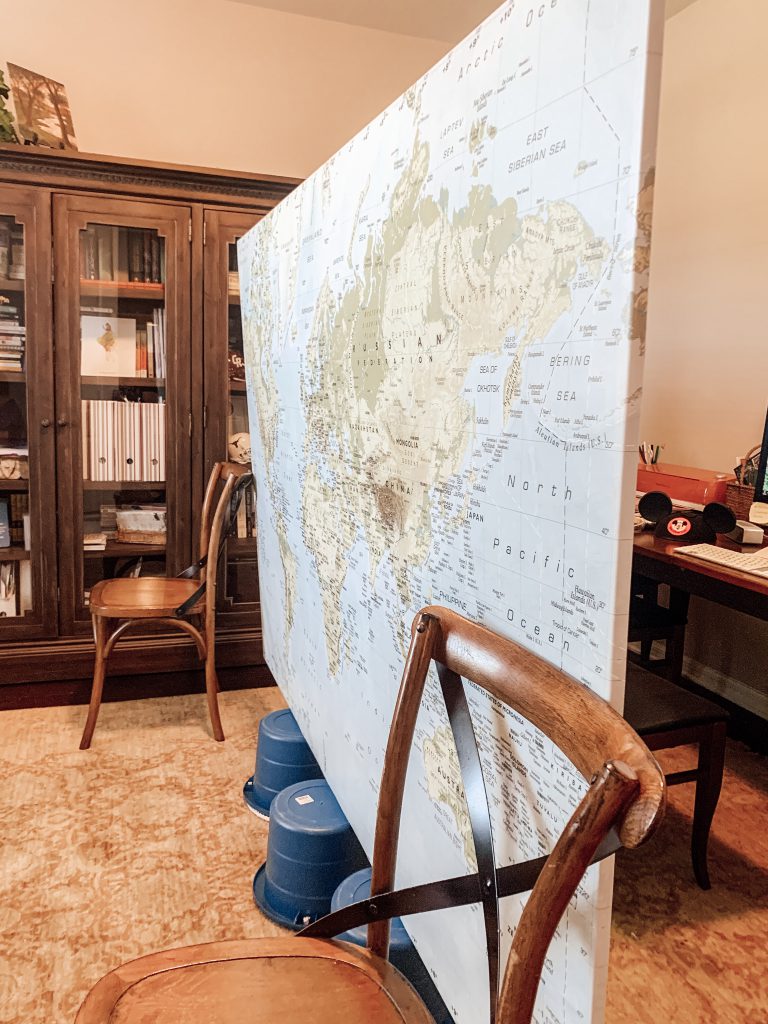
2. Place the green screen about 12-18 inches behind your chair or 3-4 feet from your computer screen. We elevate our screen by setting it on plastic buckets we already had in our garage and leaning it against two chairs.
3. Adjust the position of the green screen based on your camera’s field of view. To check this, launch Zoom from your desktop application. Once open, click on the gear icon to open your settings menu. Select the Virtual Background and then select the button at the bottom of the screen that says “I have a green screen.” Now you can choose a background from the stock photos in Zoom. Once your background is in place, you may need to adjust the position of your green screen or computer so that you don’t have any edges showing. Moving the green screen closer to the computer may also help if the image fuzzes or fades in and out at all.
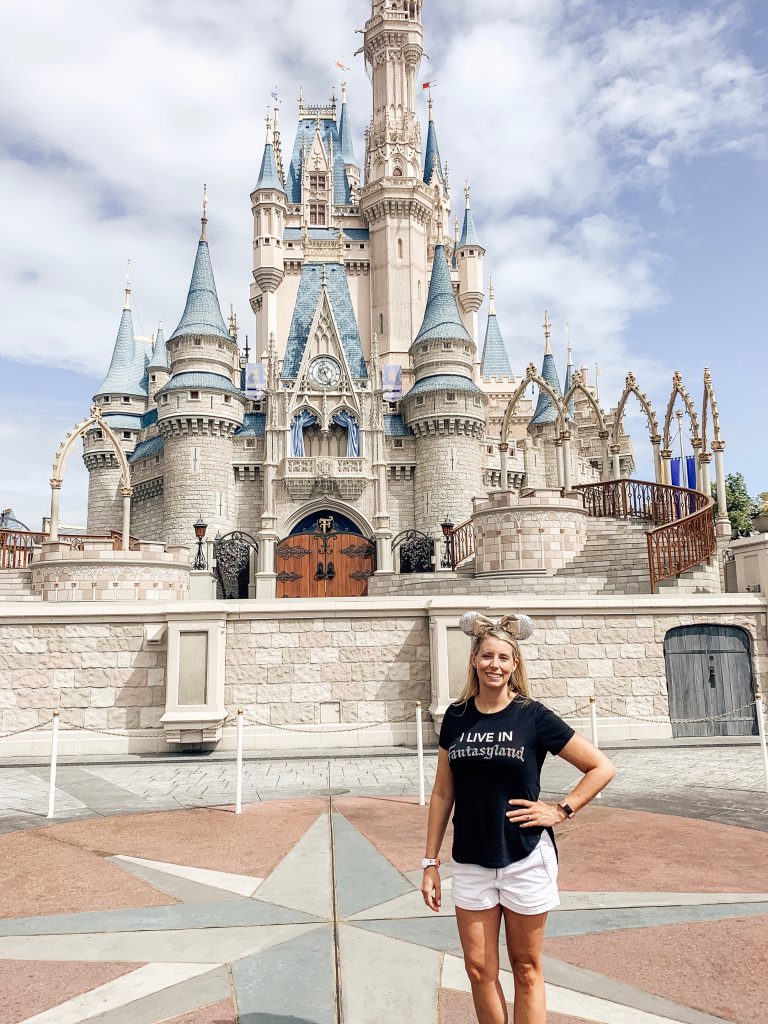
4. Have fun finding and creating new backgrounds! I, of course, am most missing Disney and the beach and my backgrounds reflect that! I think I have a background for each park for both day and night.

While I am not loving having so many interactions solely through the computer, the virtual backgrounds have made our meetings a lot more fun! And a bonus is that my kids can run around behind the screen being silly and no one can tell! Check out my DIY Green Screen Tour video below!
Let us know if you make one and how it turns out!